Basic Guide to e-Learning Platform (Lecturer)
Basic guide in managing course for lecturer in e-Learning paltform
- Introduction
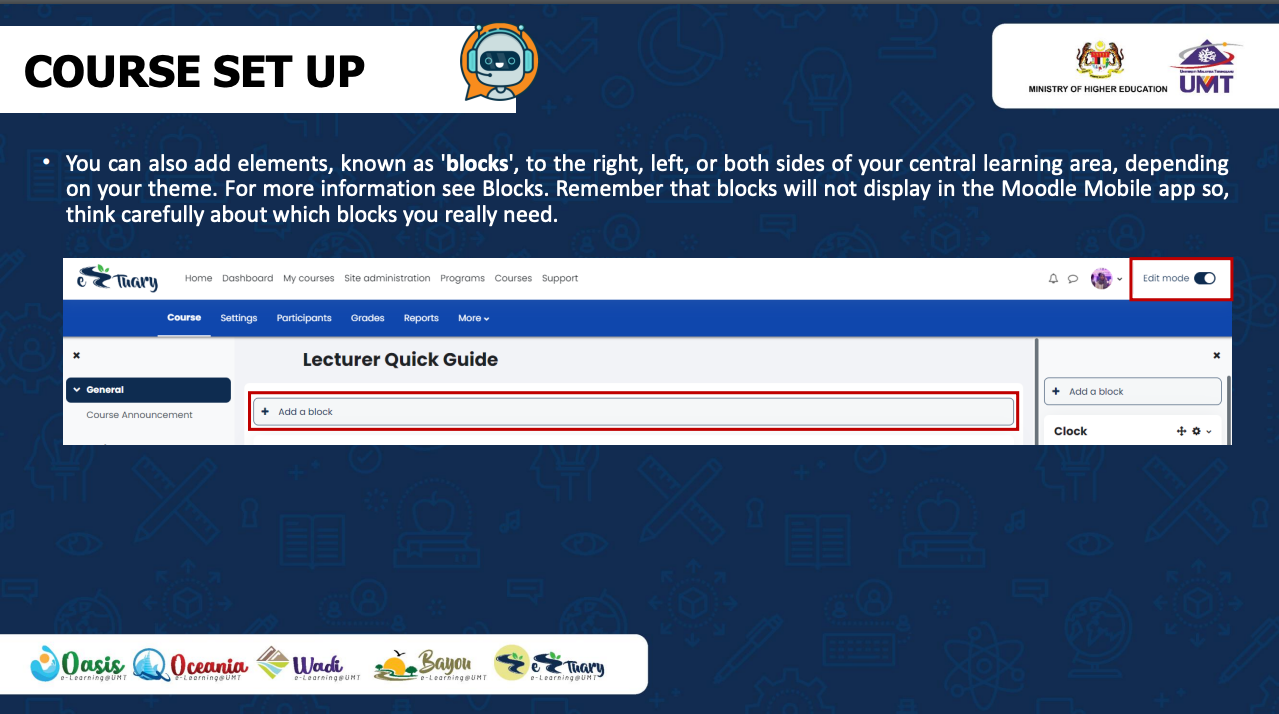
- Course Set Up
- Course Enrollment
- Tracking Progress
- Restricting Access
- Backup and Restore
- Live quiz announcement
Introduction
Welcome to Manual e-Pembelajaran
Welcome to Manual e-Pembelajaran untuk Platform e-Pembelajaran Universiti Malaysia Terengganu
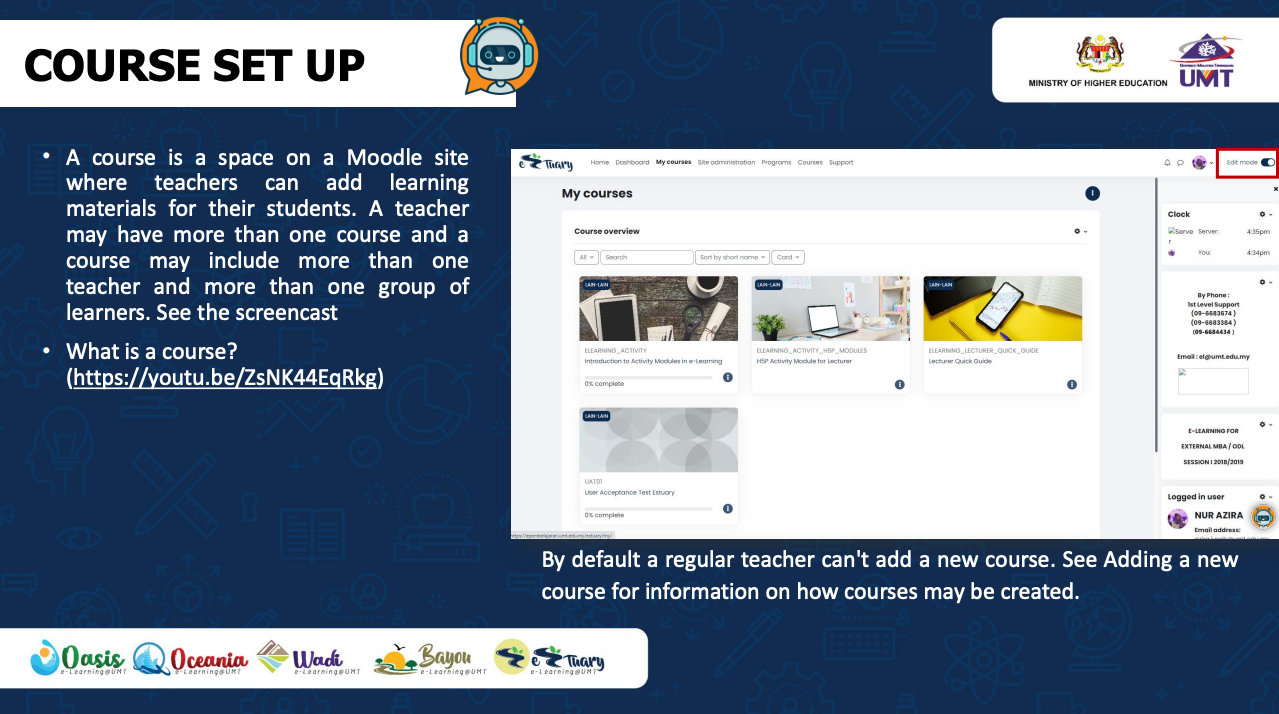
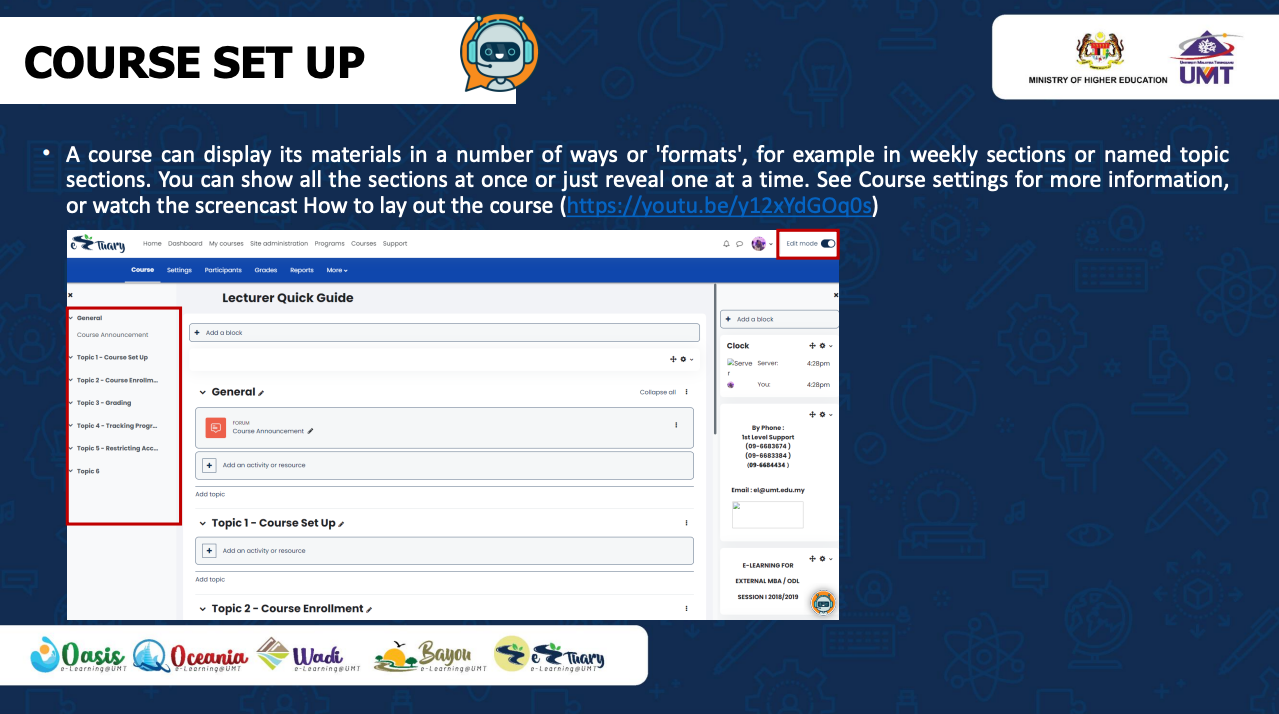
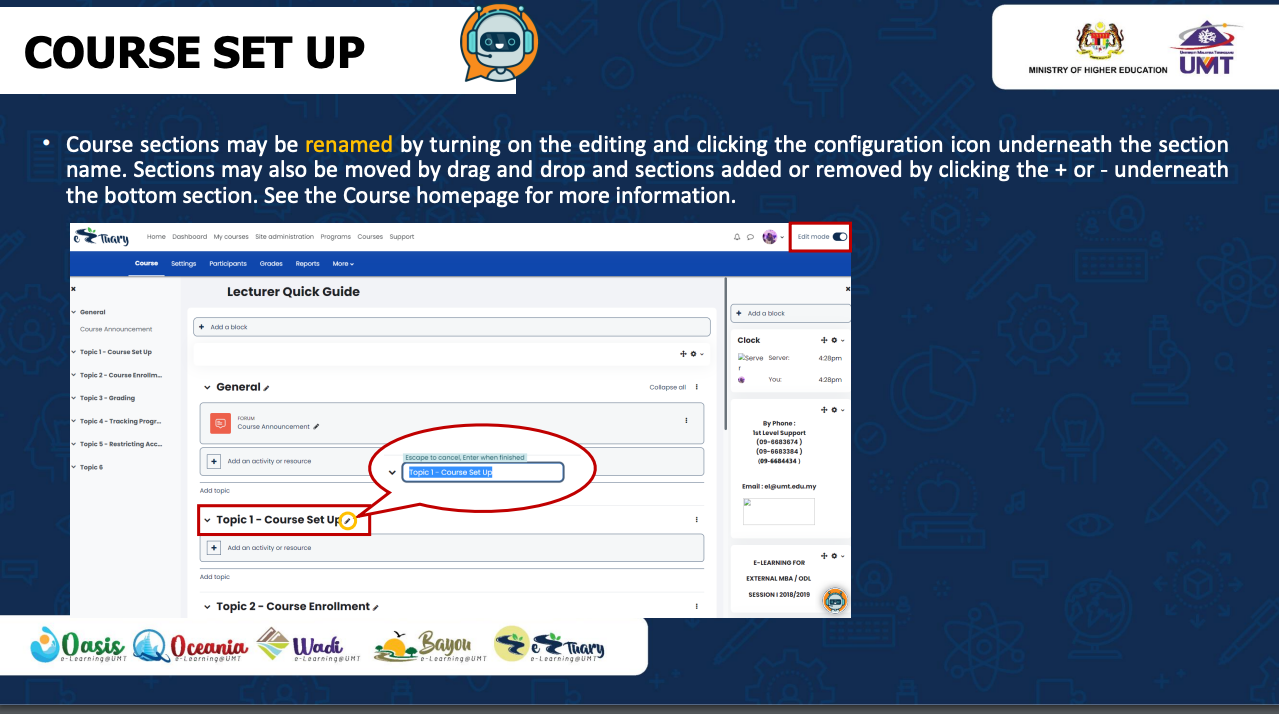
Course Set Up
Course Enrollment
Before a learner can access your course, they must first be authenticated on the site and that is the responsibility of the site administrator.

There are several enrollment methods available to a teacher, what is available, again, depends on the site administrator. The admin might enroll students into the course automatically, or the teacher might be able to let students enroll themselves. This is the manual enrollment method. Other options can be seen in the Enrolment methods link and include Self-enrolment and guest access.
An enrollment key may be set if self-enrolment is enabled so only students with the key can enter. The screencast Giving learners course access gives more information on course enrollment.
Tracking Progress
If completion tracking has been enabled for the site and in Course navigation > Settings, you can then set completion conditions in activity settings. A button with completion requirement information will appear to the right of the activity and a student may either be allowed to check it manually, or the item will show as complete once the criteria for that particular activity have been met. Completion indicators (circles) are displayed in the course index and reflect the completion status of each activity, for quick checking.
This feature can be combined with Course completion so that when certain activities have been completed and/or grades obtained, the course itself is marked as complete.

Badges can also be issued, manually or based on completion criteria to act as a motivator and record of course progress.
Restricting Access
A course can be set to display everything to everyone all the time, or it can be very restrictive, displaying certain items at certain times, to certain groups or based on performance in previous tasks.

Course items and sections may be manually hidden using the 'hide' icon when editing is turned on. If Restrict access has been enabled by the administrator then a restricted access section will display in each course activity and resource, allowing you to choose how and when this item will be revealed, and whether to hide it completely or show it greyed out with the conditions for access.
Backup and Restore
use this guideline to backup and restore your courses.
https://drive.google.com/file/d/1nR99tWyzuTaTgChy9IgJ_ZKNvZiYjcoq/view?usp=sharing
* if you have a problem when restoring (File Exceed limit). Go to Course Setting and change upload limit to higher limit of your backup file
Live quiz announcement
Lecturer who conducts a live quiz can make announcement to the students when they are sitting for the online quiz. For the example scenario, the lecturer is conducting an online quiz for 1 hour while the quiz is still running. There are some question mistakes, and the lecturer wants to make an announcement about changing the question. The lecturer can use this function.
To Enable and make an Announcement to student, Lecturer can follow the step below
Enable Quiz Live Announcement
- go to Quiz settings
- go to Live Announcement
- Click Enable Live Announcement
- Set announcement polling interval
- Set announcement header
Make Announcement
- Click the quiz that already enables the live announcement function
- Click add or manage the announcement
- Put in your announcement text to announcement content
- Click add new announcement